Submit transaction enrollment requests
You can submit transaction enrollment requests either individually or in bulk through CSV import.
You must create one enrollment request for each combination of payer and transaction type. For example, you'd need two separate requests to enroll for 835 Electronic Remittance Advice (ERAs) and 270/271 eligibility checks with the same payer.
835 ERAs: Once enrollments are live, you'll no longer receive ERAs for that provider through your previous clearinghouse. If the payer supports it, you can specify a requested effective date to help coordinate your migration to Stedi.
Consider enrollment scope
When you enroll a provider for 835 Electronic Remittance Advice (ERAs), payers can scope the enrollment in one of two ways:
- NPI: The payer registers only the specific National Provider Identifier (NPI) you submitted in the enrollment request. Other NPIs under the same Tax Identification Number (TIN) continue receiving ERAs through their existing clearinghouses.
- TIN: The payer registers all NPIs under the TIN. When you enroll one NPI, the payer switches the entire TIN to Stedi, affecting all NPIs that share that TIN.
Payers vary in how they manage enrollment scope, and this information isn't always disclosed to Stedi. For payers with TIN scope, enrolling one NPI may unintentionally enroll the other NPIs under that TIN. This means the ERAs for all of the associated NPIs will start flowing through Stedi - not just ERAs for the NPI you meant to enroll.
Prevent disruptions
To reduce the likelihood of unintentionally disrupting your workflows, we recommend:
- Enroll all NPIs that share the same TIN at the same time. This is common for hospital systems, clinic networks, or large medical groups that have multiple service locations operating under the same billing entity.
- If you need to keep some NPIs with your existing clearinghouse, contact Stedi support before submitting enrollment requests. We can help ensure the process goes smoothly.
Submit enrollment requests
Submit enrollment requests individually through the Stedi portal or in bulk using CSV import.
Individual submission
Individual submission is the simplest way to complete transaction enrollment. It involves two steps: creating a provider record and submitting enrollment requests.
Step 1: Create a provider record
You must create a provider record with the name, tax ID, NPI, and contact information of the billing provider you plan to use in claims. Stedi submits this information to the payer as part of the enrollment process.
If you're a solo provider, this is likely your information. If you're enrolling a group practice, you only need to create provider records for the NPIs and the tax IDs you use for billing. You don't need to create provider records for individual rendering providers.
To create a provider record:
- Go to the Providers page.
- Click New provider.
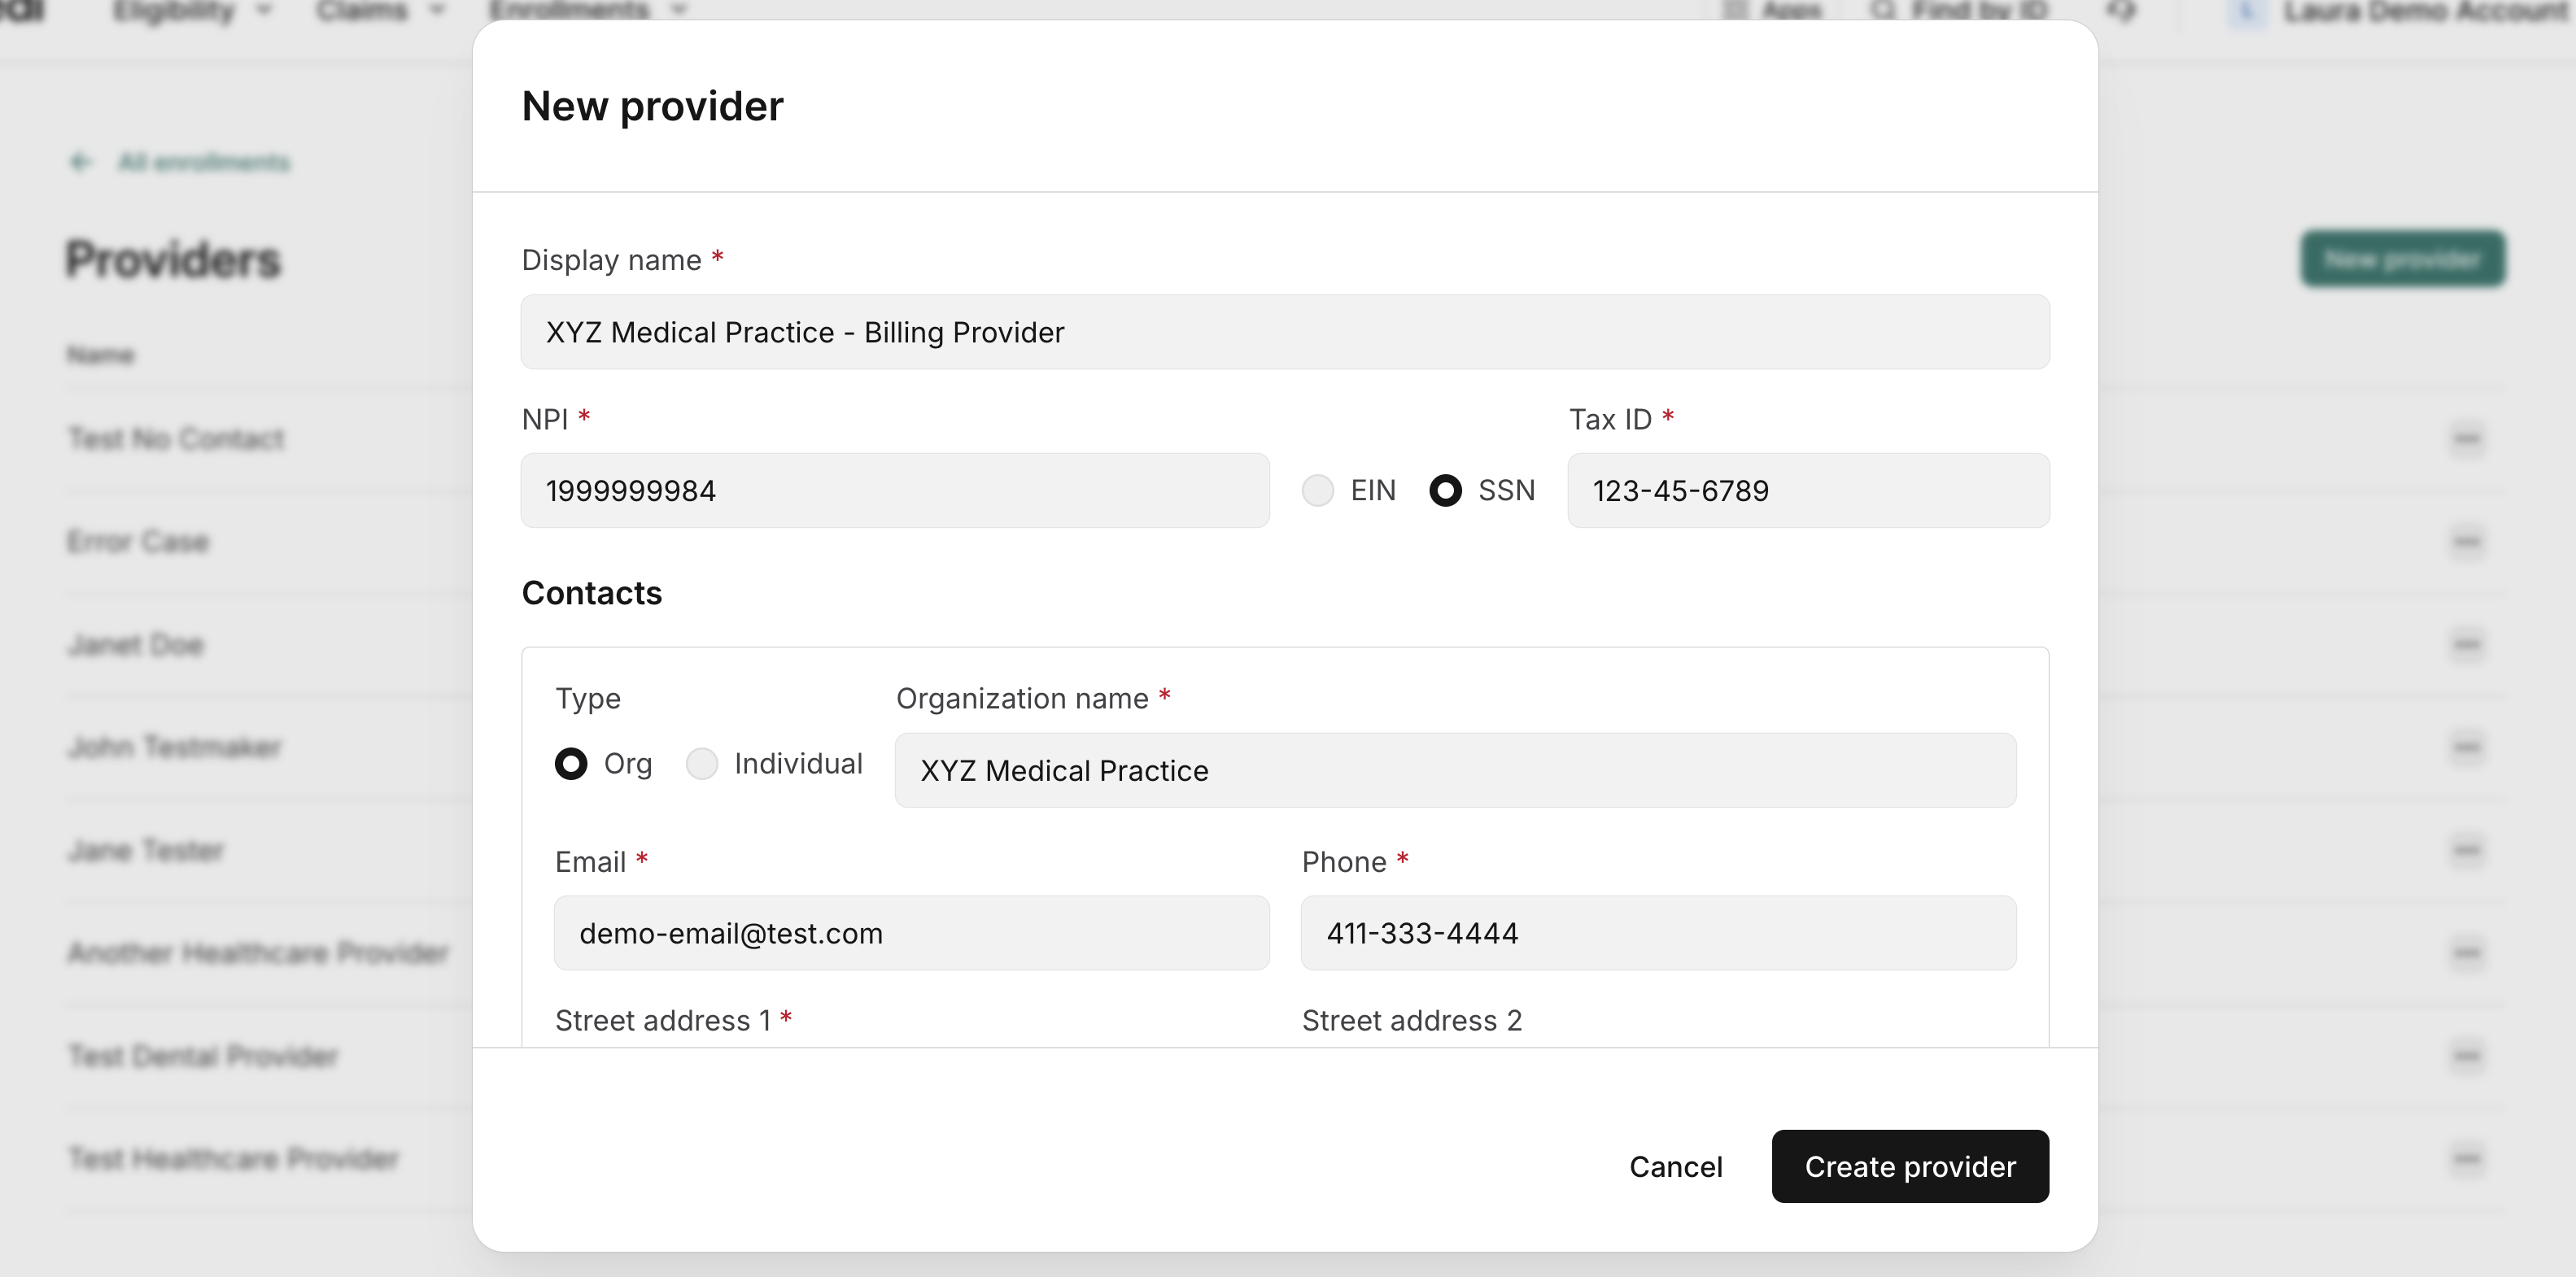
- Enter the required information:
- Display name: A name to help you identify the provider record in your account. For example, "XYZ Medical Group". We don't share this name with payers.
- NPI: The National Provider Identifier (NPI) on file with the payer that you use for billing. If you're enrolling a group practice, this is typically the group's NPI.
- Tax ID: The tax ID, which can be an EIN or SSN. This should be the tax ID on file with the payer that you use for billing.
- Contacts: This is where the payer will send communications about the enrollment, if needed. For many providers, Stedi can fetch contact information from the NPI registry. The name and address should exactly match what the payer has on file. However, the email and phone number can be set to wherever you want to receive payer communications.
- Click Create provider.
The provider record is created and appears in the list on the Providers page.
Step 2: Create enrollment requests
Once you've created a provider record, you can attach it to one or more enrollment requests.
To create an enrollment request:
-
Go to the Enrollments page.
-
Click New enrollment.
-
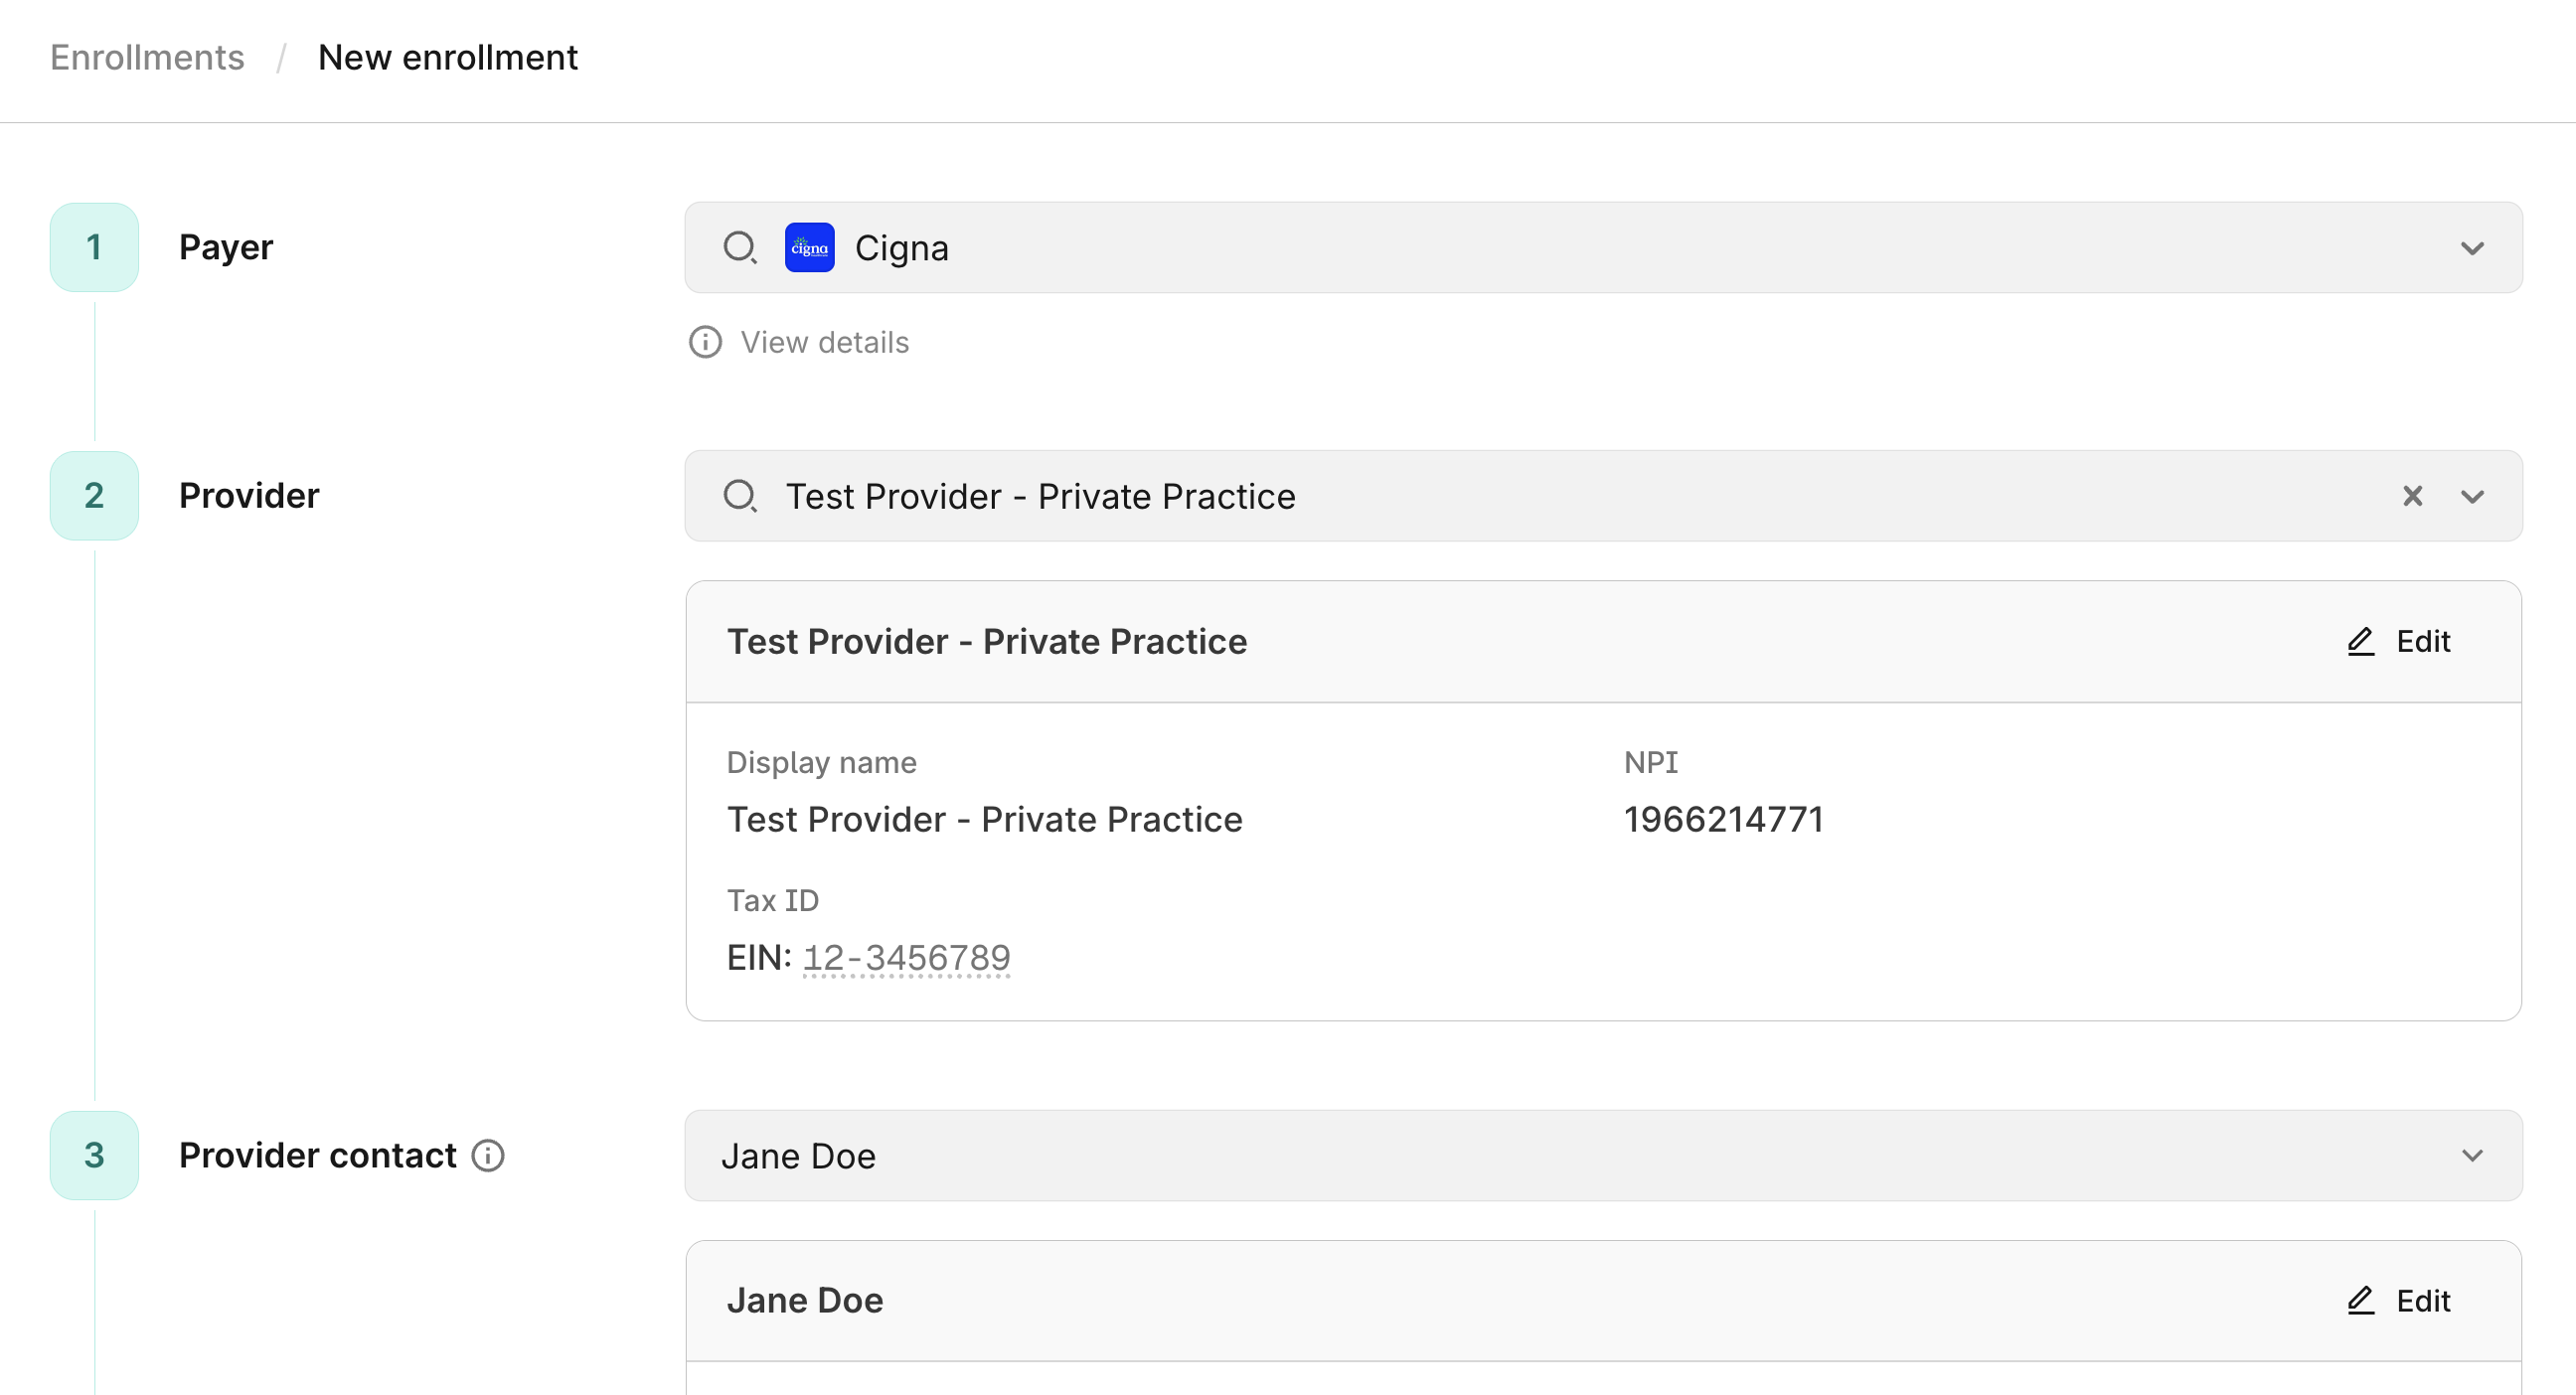
Complete the required information:
-
Payer: Select the payer you want to enroll with. Start typing the payer's name to filter the list.
-
Provider: Select an existing provider record. The form automatically populates the provider's information. You can choose to use an existing contact or enter new contact information for the payer to use for communications about the enrollment. Review our guidance on provider contact information to ensure updates go to the correct location.
-
Transaction: Select the transaction type you want to enroll for. The form populates the list of transaction types that the payer supports, and you'll only be able to select transaction types that require enrollment.
-
Aggregate ERAs by (optional): For Electronic Remittance Advice (ERA) enrollments with supported payers, you can specify an aggregation preference.
-
Requested effective date (optional): For supported payers, you can specify the date you'd like the enrollment to take effect. This is helpful for coordinating the migration from your previous clearinghouse, especially for ERA enrollments. Visit Requested effective date to learn more.
-
-
Stedi contact person: This is the email address where Stedi will send updates about the enrollment request. We'll use it to notify you when there are next steps and send updates on the enrollment's status. This email address can be different from the contact information you provided in the provider record. Set it to wherever you want to receive Stedi's communications about the enrollment.
-
-
Click Create enrollment. Stedi asks you to confirm the information.
-
Review the enrollment information carefully and then click Submit enrollment.
The enrollment request is created and appears in the list of enrollments on the Enrollments page.
Bulk submission - CSV import
You can import enrollment requests from a CSV file. This is a great option if you need to submit many requests at once.
To submit enrollment requests through bulk CSV import:
- Go to the Bulk imports page.
- Click New bulk import. The upload page contains detailed instructions for formatting the CSV file.
- Download the CSV template and prepare your file according to the provided instructions. We also recommend reviewing the instructions about enrollment contact information and practices and facilities with multiple providers or locations to ensure your file is set up correctly.
- Click + Upload file and select your file or drag and drop your file into the Upload CSV section.
- Enter a Name for the batch. Stedi displays this batch name in the portal, so choose something descriptive.
- Click Verify file. Stedi checks for errors and flags any rows that require adjustments. If there are errors, you can either fix them and re-upload the CSV file or click Execute import without invalid rows to proceed with importing valid rows.
- Click Execute import. Stedi processes the import and creates the enrollment requests.
You can review the status of each bulk import on the Bulk imports page. The overview shows the number of rows that were successfully imported, the number of rows that were skipped due to errors or duplicates, and the date and time of the import. Click an import to view more details and download the import status report.
Imported enrollment requests appear in the list of enrollments on the Enrollments page.
Importing behavior
Stedi automatically does the following when importing enrollment requests from a CSV file:
- Creates a new provider record for each unique combination of NPI and tax ID in the CSV file. For example, these two providers would be created as separate records even though they have the same name and NPI:
John Doe, NPI: 1999999984, Tax ID: 987654321John Doe, NPI: 1999999984, Tax ID: 123456789When a row in your CSV file contains an NPI and tax ID that match an existing provider record in your account, Stedi overwrites the existing provider record with the information in the CSV file. Any changes (such as updated address or contact information) aren't automatically applied to existing enrollment requests for that provider, only to requests created after Stedi updated the record.
- Creates and submits enrollment requests.
- Removes duplicate rows to prevent duplicate requests.
- Skips rows that contain errors. For example, if a row contains an invalid NPI, Stedi skips that row and imports the rest of the file. Review the import status report to understand which rows were skipped and why.
Import status report
After importing, you can download a report that shows the status of each row in the CSV file. For example, duplicate rows are marked as Duplicate: Enrollment already exists in the result column.
To download the report:
- Go to the Bulk imports page.
- Click an import to view its details.
- Click Download full report.
Rows with errors display a clear inline error message to help you make the necessary adjustments. You can fix rows with errors and re-upload the CSV file as many times as needed until all imports are successful.
Enrollment contact information
When you submit an enrollment request, you'll need to provide two types of contact information. It's important to understand the difference between them.
Provider contact
This is where the payer will send communications about the enrollment, if needed.
- The name and address should match exactly what the payer has on file for the provider. Some payers reject enrollment requests with addresses that don't match their records.
- However, you may want to set the phone number or email to a different contact - for example, a credentialing or general inbox - to ensure payer communications go to the right place.
- If you're enrolling a group practice, select a single administrative entity as the contact - don't use individual provider emails.
Where to set
You can specify contacts on both the provider record and on the enrollment request.
- (Optional) Provider record: These contacts are for convenience - they allow the Stedi portal to prepopulate contact information options when you create enrollment requests. They aren't required when you create provider records, and they aren't automatically added to enrollment requests.
- (Required) Enrollment request: You must specify a provider contact on the enrollment request. This is the information that Stedi shares with the payer when submitting the enrollment on your behalf. This contact information doesn't need to match the existing contact information on the provider record, which allows you to use different contacts for different payers as needed.
Stedi contact email
This is the email address where Stedi will send updates about the enrollment. It's required when you submit an enrollment request - we use it to notify you when there are next steps and send updates on the enrollment's status.
This is called the Stedi contact person on the enrollment request form, and it's the user_email column in the CSV file for bulk imports.
This email address can be different from the contact information you provided in the provider record. Set it to wherever you want to receive Stedi's communications about the enrollment.
Requested effective date
You can specify a requested effective date for transaction enrollments. This is the date you'd like the enrollment to take effect with the payer. For example, setting this for an 835 Electronic Remittance Advice (ERAs) enrollment to a future date helps you coordinate the migration from your previous clearinghouse to Stedi.
Stedi processes enrollments accordingly, but can't guarantee that the enrollment will be effective on this exact date.
Check payer support
You can determine which payers support requested effective dates in the Payer Network by checking the Requested effective date field for the transaction type.
Set requested effective date
To specify a requested effective date on enrollments:
- Stedi portal: Enter a date in the Requested effective date field when submitting enrollments. This field is visible for supported payers once you select a transaction type. You can submit today's date or a future date up to 6 months from today.
- CSV import: Populate the
requested_effective_datecolumn in YYYYMMDD format for each enrollment. Only set this for payers that support requested effective dates.
If you include a requested effective date for an unsupported payer, Stedi rejects the enrollment request. If you don't set a requested effective date, Stedi defaults to the enrollment's submission date.
ERA aggregation preference
835 Electronic Remittance Advice (ERAs) can contain payment and adjudication details for multiple claims.
For supported payers, you can specify an aggregation preference for grouping claim information within each ERA. This helps ensure ERAs arrive in the way your billing system expects, reducing time spent matching payments to providers or practices.
Aggregation types
Payers use one of the following billing provider identifiers to group claim information in ERAs:
- NPI: The National Provider Identifier (NPI) always uniquely identifies a single provider entity, either an individual provider or an organization. For example, a doctor employed by multiple clinics may use the same NPI to submit claims across multiple TINs.
- TIN: The Tax Identification Number (TIN) can be the provider's Social Security Number (SSN) or Employee Identification Number (EIN). TINs are sometimes shared across multiple billing providers within the same organization. For example, a clinic may submit claims for several doctors using a single TIN.
Most payers default to TIN-based aggregation, and not all payers support both aggregation types.
Check payer support
You can determine which aggregation types your payers support through the Payer Network - check the ERA aggregation preferences field.
Set aggregation preference
To specify your aggregation preference on ERA enrollments:
- Stedi portal: Choose an identifier in the Aggregate ERAs by section when submitting ERA enrollments.
- CSV import: Populate either the
aggregationPreferenceNpi(10 digit string) oraggregationPreferenceTaxId(9 digit string) column for each enrollment.
Stedi attempts to enroll with with your specified preference, but it's not guaranteed - ultimately, the payer controls how ERAs are grouped and routed. If you don't set a preference, Stedi automatically selects a default based on the payer's supported aggregation types and the available identifiers for the provider.
When available, Stedi displays the aggregation preference on the enrollment request's details page in the Stedi portal.
Independent from scope
ERA aggregation preferences and enrollment scope are independent payer behaviors:
- Enrollment scope: Controls which NPIs the payer registers when you submit an enrollment request.
- ERA aggregation: Controls how the payer packages 835 ERAs after enrollment is complete - grouping claim information by NPI or TIN.
The payer's supported aggregation types don't indicate how they manage enrollment scope. A payer can support NPI-level aggregation preferences for 835 ERAs and manage enrollments at the TIN level. In these cases, specifying NPI as your preferred aggregation type in the enrollment request won't prevent the payer from enrolling all the NPIs associated with a specific TIN once the request is processed.
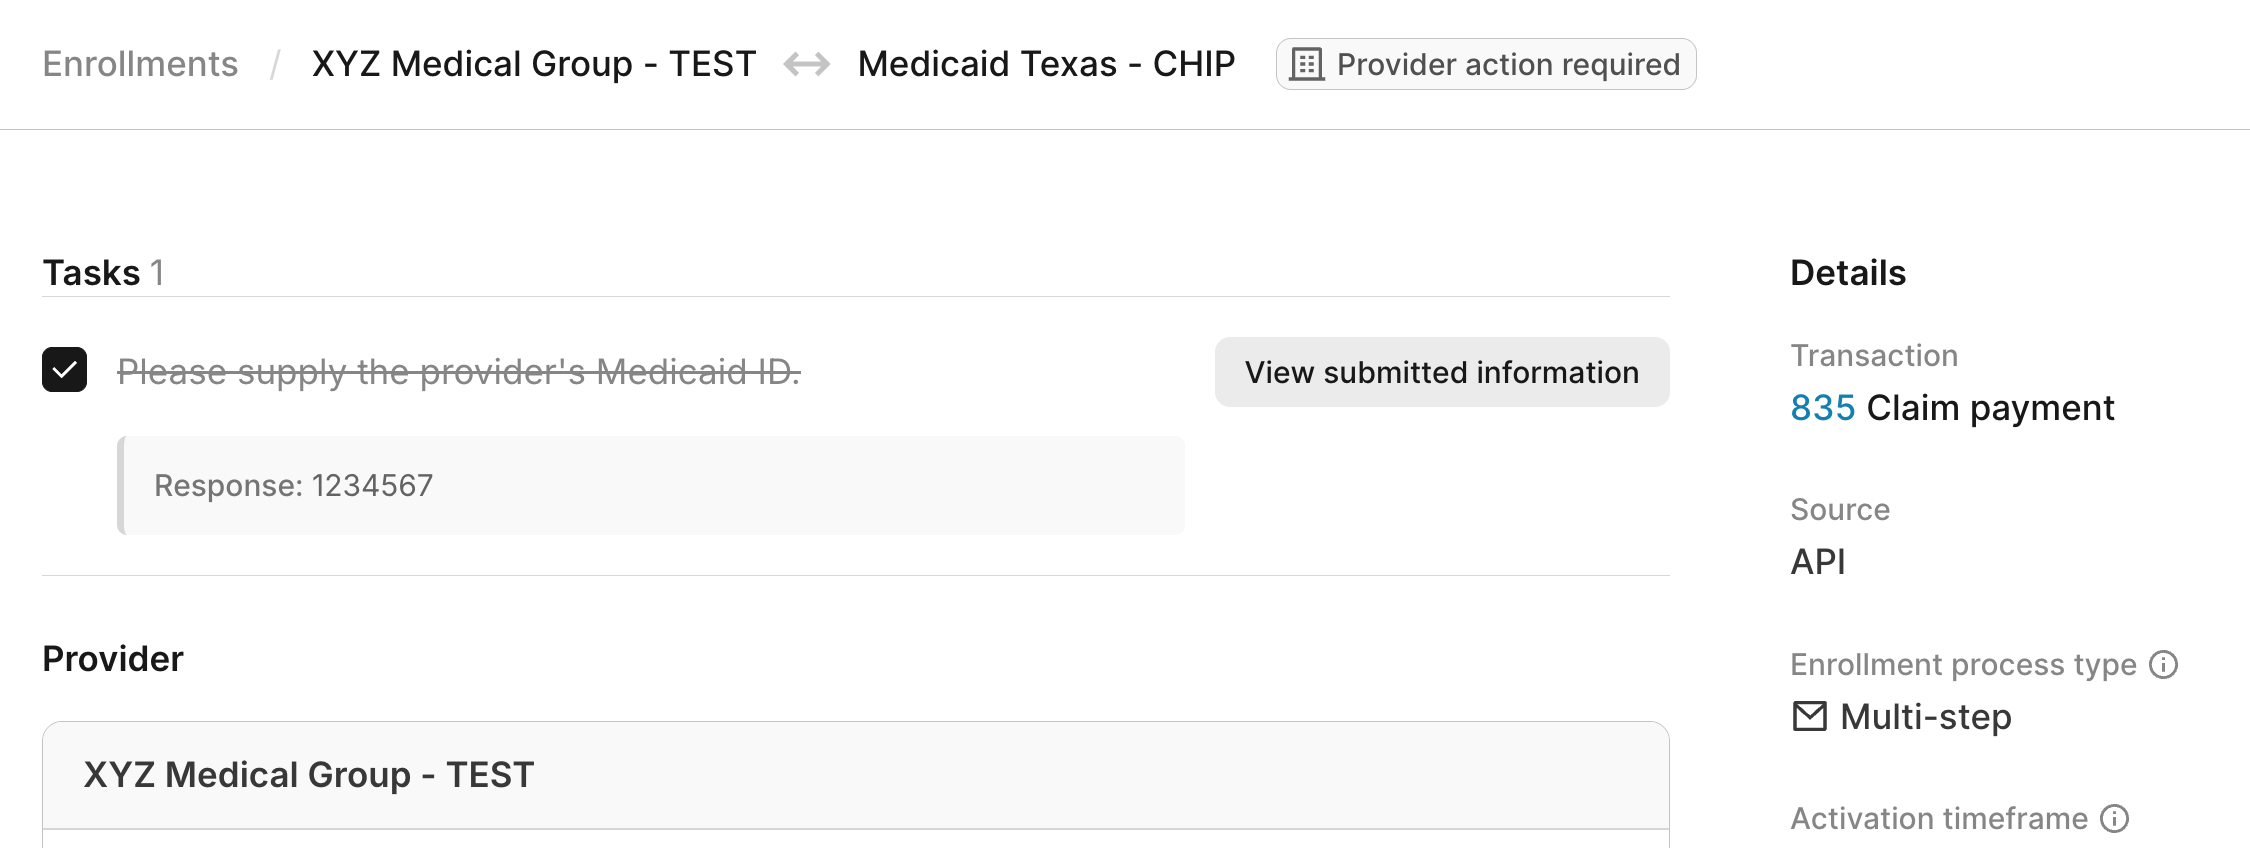
Complete enrollment tasks
Tasks are actions that either the provider or Stedi need to complete to move the enrollment process forward.
When there's a new task that requires you to take action, Stedi adds a task to the enrollment request with instructions and sets the enrollment status to Provider Action Required. You'll receive a notification email that there's a new task to complete.
Stedi is automatically notified when you complete a task, and the enrollment process continues.
Task types
Tasks fall into three categories:
- Follow instructions: Complete a specific action, such as logging into a payer portal or contacting a department. The task includes instructions explaining what to do.
- Provide information: Supply specific information or confirmation to Stedi. The task describes what information is needed.
- Provide documentation: Upload PDF documentation related to the enrollment.
When a task requires documentation, Stedi may ask you to:
- Complete a template: Stedi provides a PDF template for you to download, fill out, and upload back to Stedi.
- Upload supporting documentation: Stedi asks you to provide a document you already have, such as a W-9 form or voided check.
Complete tasks
You can review and manage tasks at the top of the enrollment request's details page in the Stedi portal. You must have the Operator role or above to complete enrollment tasks.
If the task requires you to complete and upload documentation, it will include instructions with a PDF template to download, fill out, and upload to Stedi.
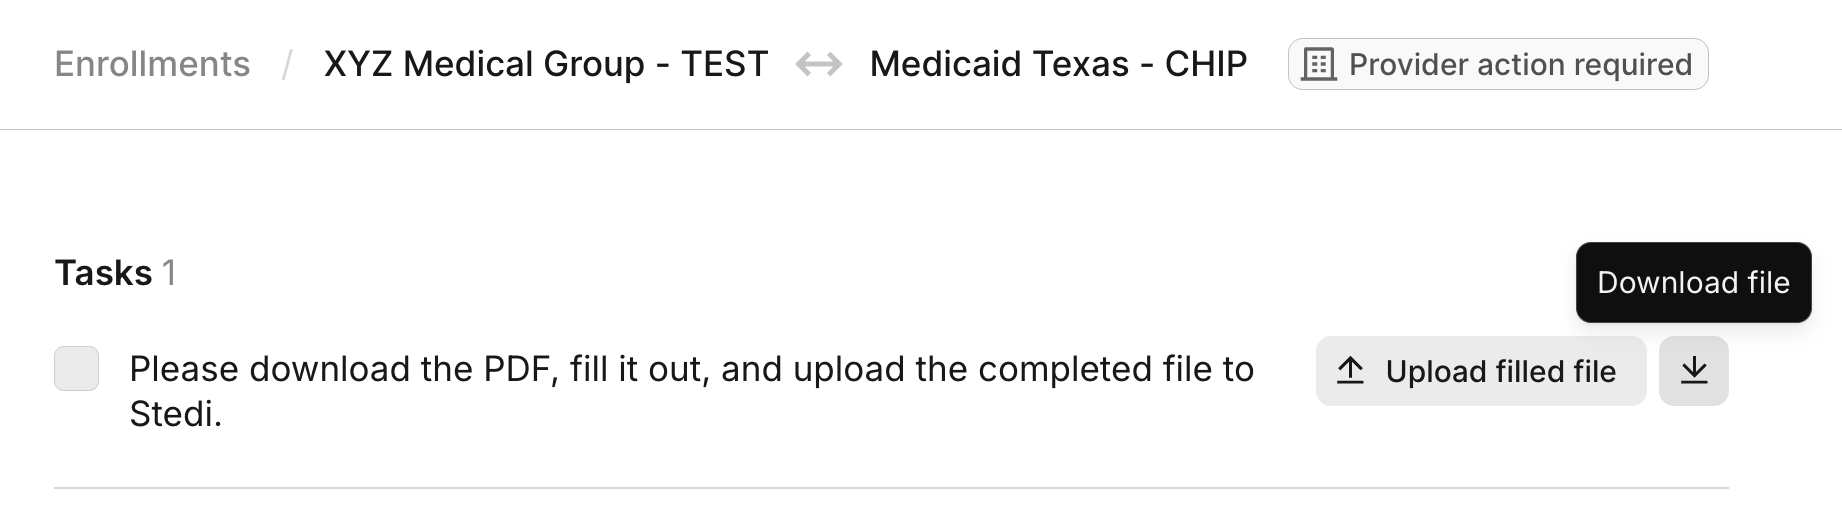
Once you've taken the required action, check the box next to the task to mark it as complete.
Practices and facilities with multiple providers or locations
Some healthcare organizations operate multiple facilities or practices under a shared structure. This is common in hospital systems, clinic networks, or large medical groups where multiple service locations operate under the same billing entity.
Transaction enrollment requires the billing provider's tax ID and NPI that you plan to use in claims and Electronic Remittance Advice (ERAs). When the same group NPI and tax ID are used as the billing provider throughout the healthcare organization, you should:
- Create a single provider record with that NPI and the tax ID. You don't need to create provider records for individual rendering providers.
- Create enrollment requests with the billing provider record attached. You don't need to submit additional enrollment requests for individual rendering providers. Select a single administrative entity as the contact - don't include individual provider emails. This should be a credentialing or general inbox.
- Use the taxonomy code that matches the billing provider's credentials when submitting claims.
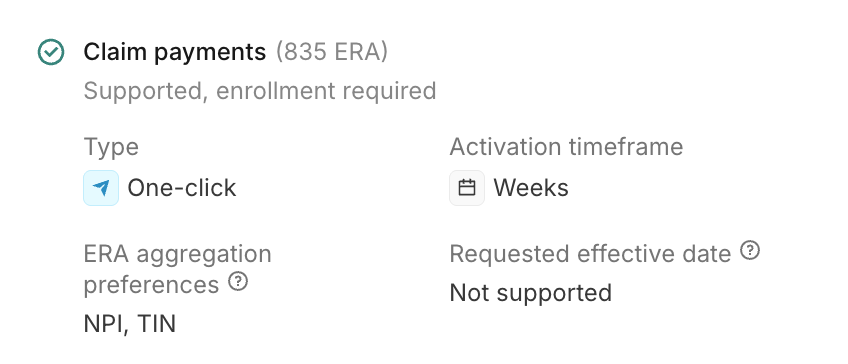
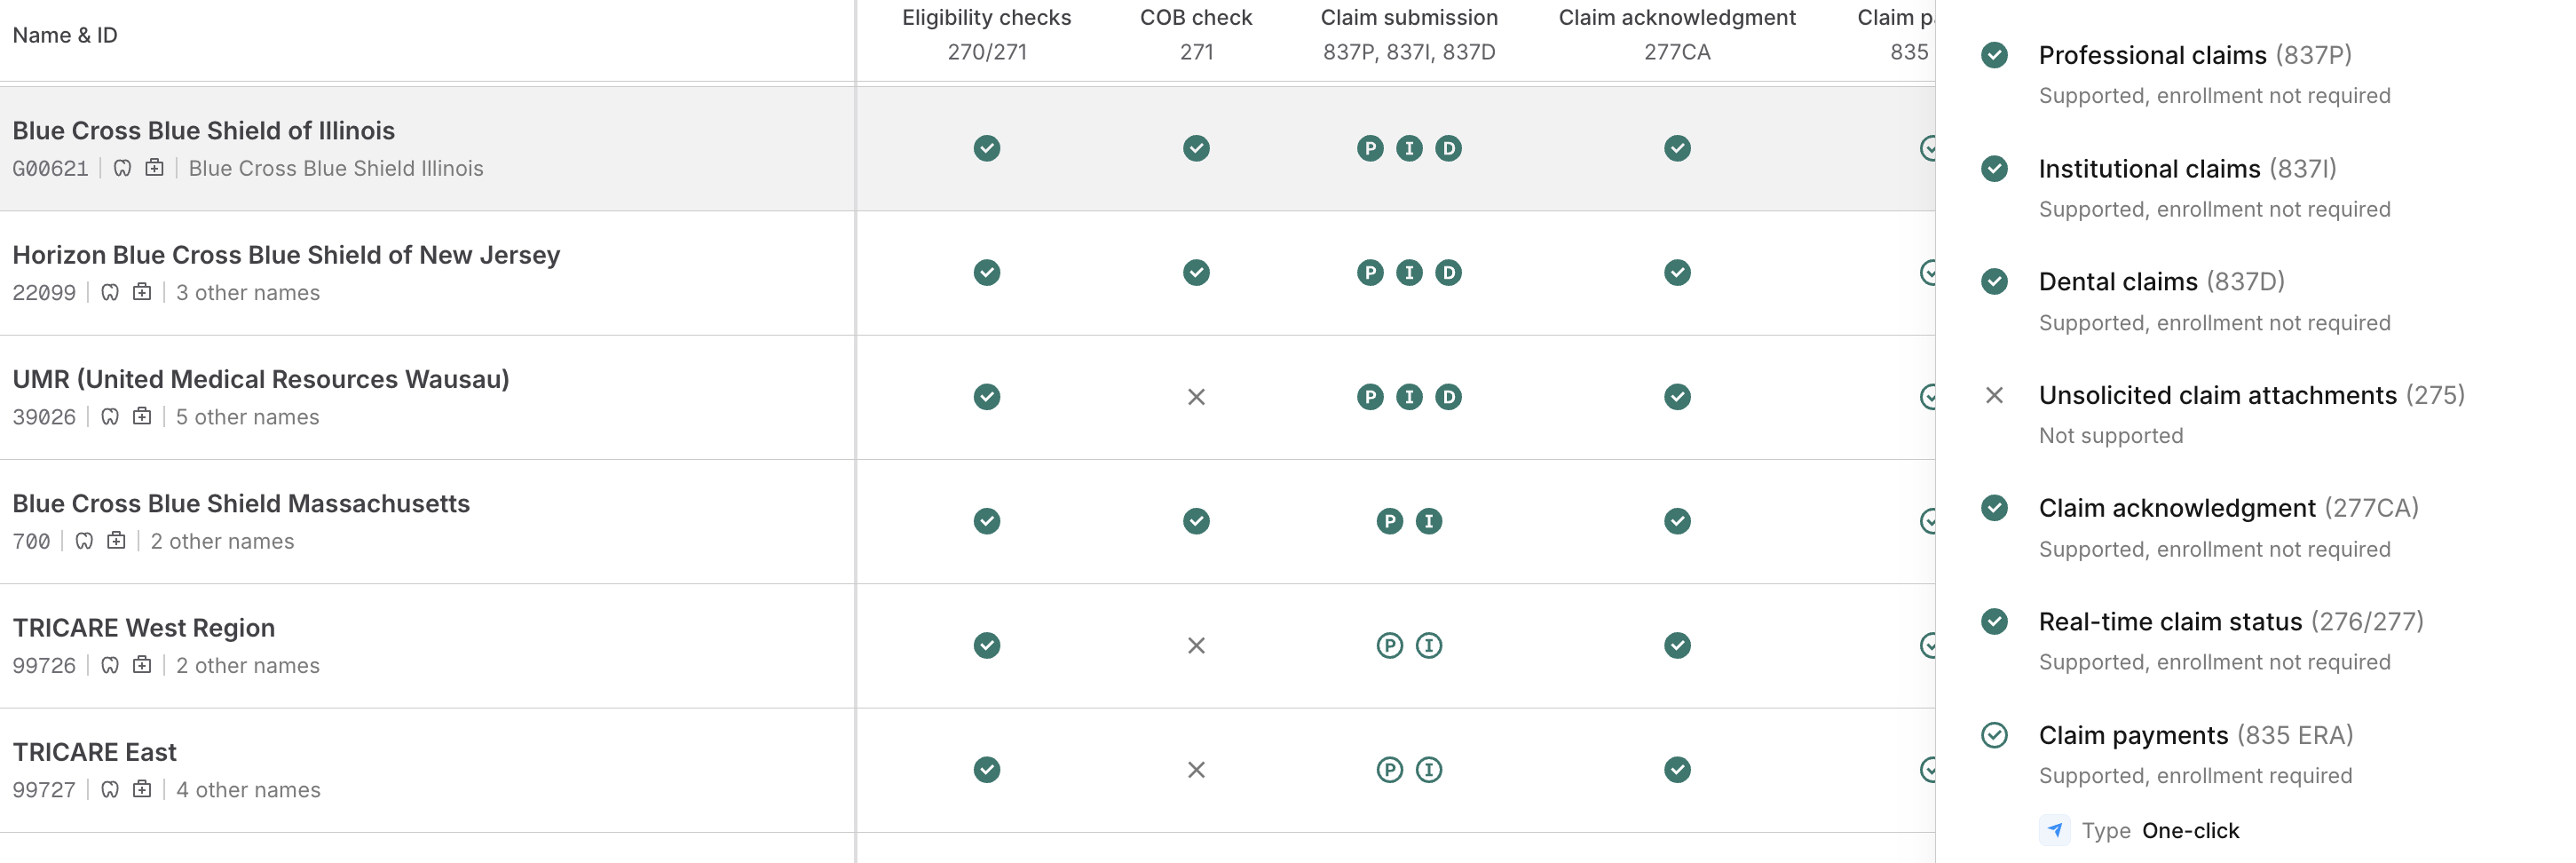
One-click enrollment
We offer one-click enrollment for eligible payers. Once you submit the enrollment request, Stedi handles the entire process without any additional action from you. These payers don't require any signatures or documentation other than what is included in the enrollment request.
To determine whether a payer is eligible for one-click enrollment:
- Go to the Payer Network.
- Search for the payer you want to enroll with.
- Click the payer's name to view its details. Stedi lists the Type as One-click for transaction types that support one-click enrollment.
The following example shows that one-click enrollment is available for 835 ERAs with Blue Cross Blue Shield of Illinois.
Automatic enrollment requests
Some payers, such as the Centers for Medicare and Medicaid Services (CMS), require enrollment for eligibility checks.
Eligibility checks fail when a provider isn't properly enrolled. In these cases, Stedi automatically submits the required transaction enrollment request. Payers typically process these requests within 1-2 days.
We support automatic enrollment requests for the following payers in the Payer Network:
- The Centers for Medicare and Medicaid Services (CMS) (Payer ID:
CMS) - CMS MBI Lookup with SSN (Payer ID:
MBILU) - Highmark of Pennsylvania (Payer ID:
54771) - Highmark Senior Health Company (Payer ID:
15460) - Highmark Blue Cross Blue Shield of Delaware (Payer ID:
030) - Highmark Blue Cross Blue Shield of West Virginia (Payer ID:
54828)
Please note:
- If the provider's NPI isn't active in the National Plan & Provider Enumeration System (NPPES), or if provider name information is unavailable from NPPES, Stedi won't automatically create the enrollment. Auto-enrollment requires provider name information, which is often unavailable for deactivated NPIs.
- For CMS enrollments, the provider must also complete attestation. Stedi adds a task to the enrollment request when attestation is required.
- For CMS enrollments, the transaction enrollment request will be rejected and set to
REJECTEDstatus if the provider's NPI isn't active in PECOS, the system CMS uses to manage active Medicare providers. In this case, we'll send you instructions explaining how to resolve the issue. - Stedi sets the Stedi contact email to the oldest account member with the Admin role. This is where Stedi sends enrollment status notifications.
CMS eligibility enrollment
The Centers for Medicare and Medicaid Services (CMS) requires providers to complete attestation, also called HETS EDI Enrollment, before running Medicare eligibility checks. Attestation confirms that clearinghouses like Stedi have authorization to conduct eligibility checks on the provider's behalf. This requirement applies only to traditional Medicare, not Medicare Advantage (Part C) or Part D plans.
How attestation works
Attestation is required for each billing National Provider Identifier (NPI) enrolled with CMS for eligibility checks. Stedi can't complete this step on the provider's behalf, and there is no bulk attestation across NPIs. The process takes approximately 5-15 minutes per NPI.
When you submit a CMS eligibility check enrollment request, Stedi moves the enrollment to the Provider Action Required status and adds an enrollment task to complete attestation. The task contains instructions for completing attestation. After the provider completes attestation, they can start submitting eligibility checks immediately, even if the enrollment status is not yet Live.
CMS rejects Medicare eligibility requests from providers who haven't completed attestation using AAA error code 41.
You can view the attestation task and its status in the Tasks section of the enrollment request's details page in the Stedi portal.