

Submit professional claims - Manual
You can submit professional claims manually through the Stedi portal. Manual claim submission is useful for testing, QA, and debugging your pipeline. You can also submit claims through the API, SFTP, or as paper claims.
Once you send a claim, Stedi automatically receives and processes 277CA claim acknowledgments and 835 Electronic Remittance Advice (ERA) responses.
Before sending claims
You may need to complete the following steps before sending claims.
Transaction enrollment
Transaction enrollment is the process of registering a provider to exchange specific healthcare transactions with a payer. Some payers require enrollment before allowing providers to submit 837 claims through a new clearinghouse.
You can check whether a specific payer requires transaction enrollment for 837 claims in the Payer Network or through the Payers API.
To enroll, complete the following steps:
- Create a provider record with the information required for enrollment. If you already have a record for the provider, you can skip this step. Stedi portal | API endpoint
- Submit an enrollment request for the claim type. Stedi portal | API endpoint
For most payers that require enrollment for claim submission, enrolling through Stedi won't impact your ability to send transactions to your original clearinghouse. Only a few payers require the 837 claim to be sent to the same clearinghouse as the 835 ERA enrollment. For any questions on payer nuances, contact Stedi's support team.
Best practices
- Leverage batch enrollments when onboarding new provider groups or many providers at a time.
- For ERAs, you can only be enrolled through one clearinghouse at a time per payer per provider. When your ERA enrollment is accepted through Stedi, you'll stop receiving ERAs through the previous clearinghouse. Every other transaction type accepts enrollment through more than one clearinghouse.
Coordination of benefits check
We recommend running a coordination of benefits (COB) check to ensure you submit claims to the correct payer. COB checks can help you determine:
- If a patient is covered by more than one health plan
- Whether coverage overlap requires coordination of benefits
- Each payer's responsibility for payment (primacy) in coordination of benefits scenarios
Visit Coordination of benefits (COB) checks for more information.
Testing
The best way to test professional claims is by submitting them in test mode through the Stedi portal.
To submit test claims through the Stedi portal:
- Click your account name in the side navigation and toggle Test mode to ON.
- Go to the claims view and click Submit claim.
- Choose either CMS-1500 form or Upload raw X12 file from the dropdown.
When you send a test claim, Stedi doesn't send it to the payer. Instead, we apply our full suite of edits and repairs and return a 277CA claim acknowledgment indicating whether the claim was successfully processed.
Visit Test claims workflow to learn more about testing in the Stedi portal.
Submit professional claims
You can submit professional claims either through our interactive claim form or by uploading X12 EDI claim data.
CMS-1500 claim form
The CMS-1500 form in the portal only supports submitting claims to the patient's primary health plan, though you can include information about secondary or tertiary payers if required. To submit claims directly to secondary or tertiary payers, use the portal's X12 EDI upload functionality, or the API or SFTP instead.
To submit a professional claim: Go to the claims view, click Submit claim, and select CMS-1500 form from the dropdown.
The submission form is based on the CMS-1500 Claim Form.
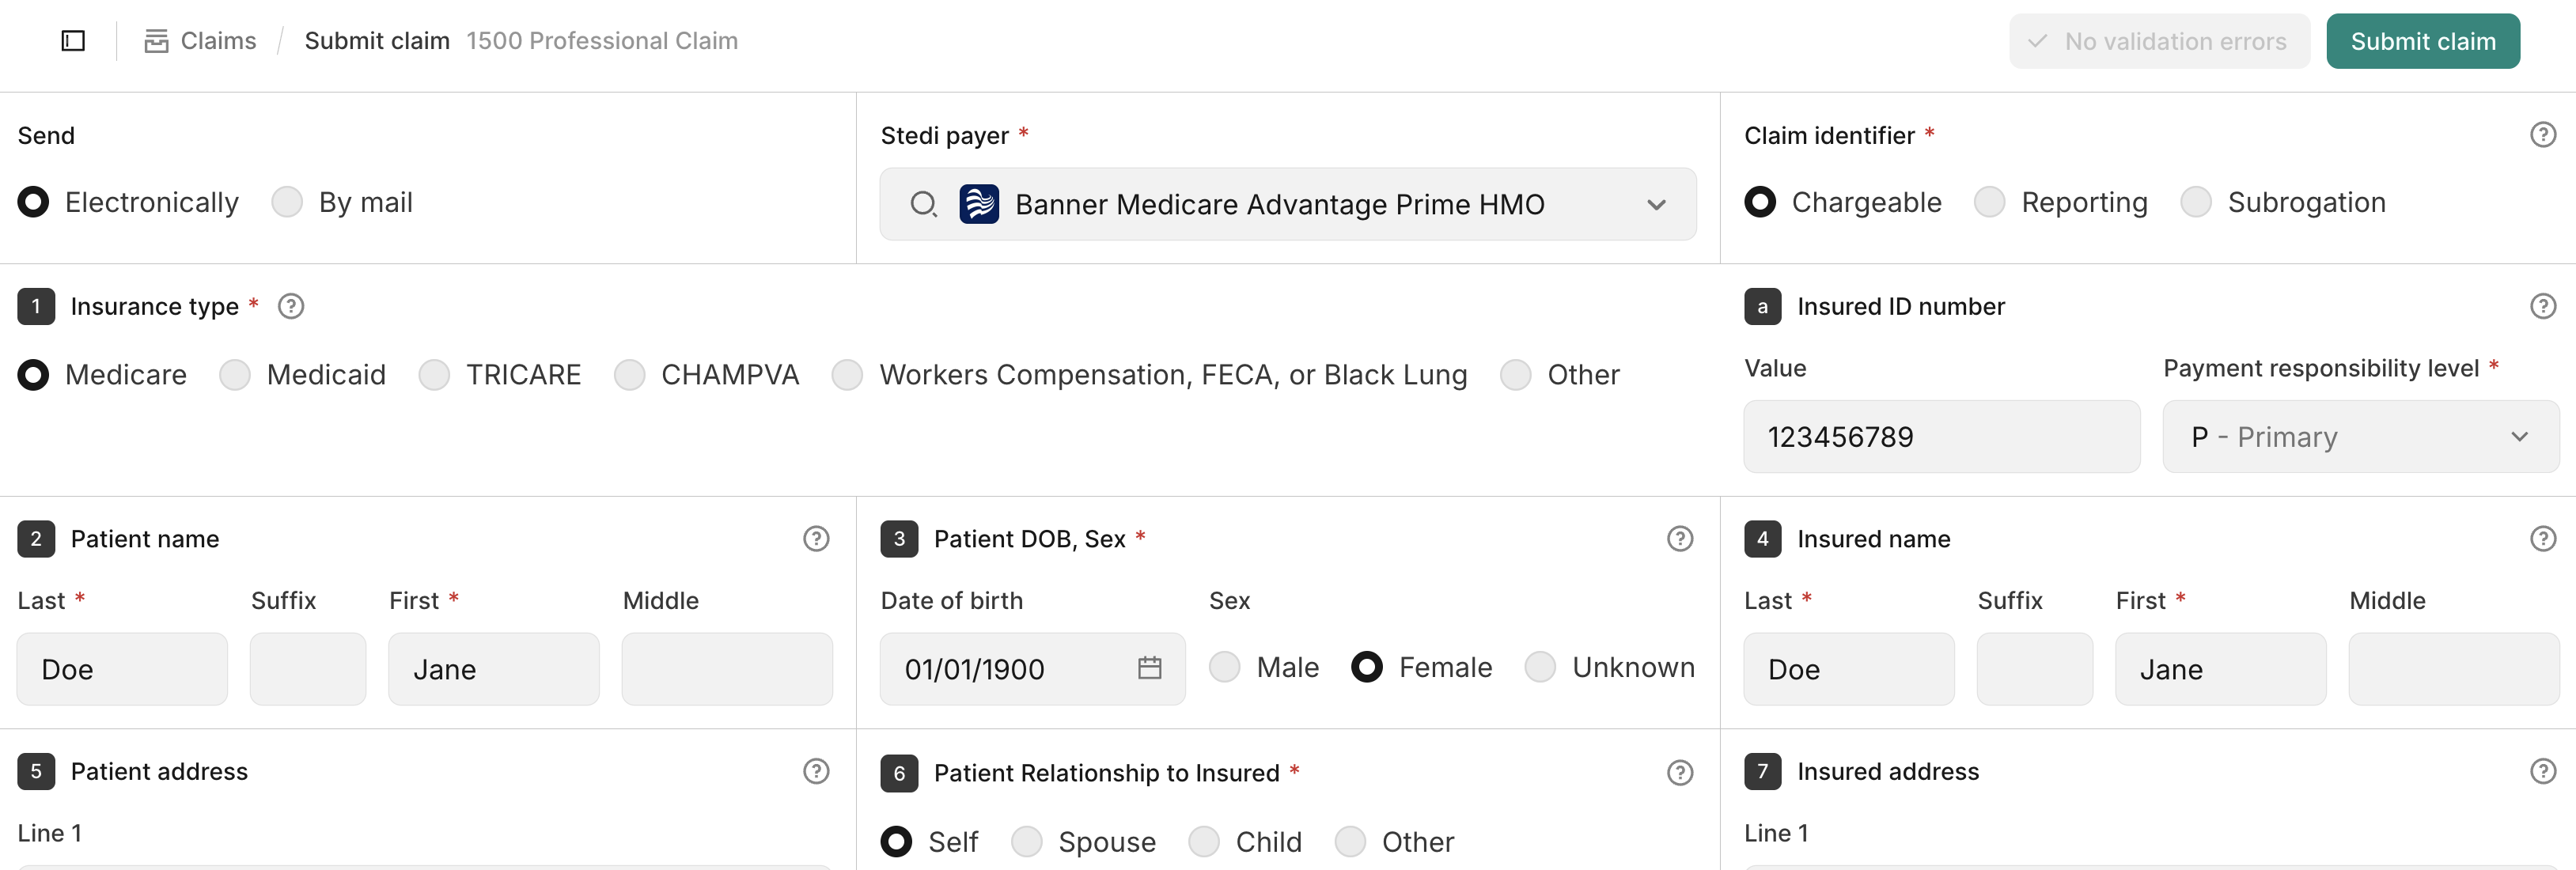
Enter the required information for your professional claim. Notably:
| Form section | Instructions and Notes |
|---|---|
| Send | Select whether you want to send the claim Electronically or By mail.
|
| Stedi payer | Select a Payer from the dropdown list. Start typing to filter the list. When you select a Medicare or Medicaid payer, Stedi automatically sets Box 1 (Insurance Type) to match. You can change the value in Box 1 if needed. |
| Patient account number | We strongly recommend submitting a unique value in Box 26 (Patient acccount number). The identifier should be more complex than a simple sequential number and should be hard to guess. The payer returns this value in related transactions, such as the 277CA and 835 ERA, so you can correlate responses and real-time claim status checks with the original claim.
|
| Line item control numbers | The line item control number is an identifier for each service line in Box 24 (Service lines) that you can use correlate the original claim with the 835 ERA.
|
| Attachments | Submit claim-level attachments in Box 19b (Claim attachments) and service-line attachments in Box 24 (Service lines). Note that you can't add attachments to claims that were already submitted through the portal. To include attachments for those, resubmit the claim with the attachments.
|
| Secondary or tertiary or payer details | Select an option in Box 11d (Is there another health benefit plan?).
|
Stedi checks for errors as you complete the form, including issues that would cause the claim to fail Stedi's claim edits. When you're finished, click Submit claim. Stedi doesn't submit the claim until you fix all errors. After submission, the claim appears on the claims view within a few minutes.
X12 EDI upload
Your X12 EDI claim data must adhere to the 837 Claim: Professional (X222A1) specification.
To manually submit an X12 EDI claim:
-
Go to the claims view.
-
Click Submit claim and select Upload raw X12 file.
-
Do one of the following:
- Click Upload X12 EDI and select an existing
.edifile. - Select the transaction type and then paste the X12 EDI content into the text area.
You can submit multiple claims in a single file, as long as all claims are 837s of the same type and X12 version. Visit Bulk claims for details.
- Click Upload X12 EDI and select an existing
-
Set
ISA15(Interchange Usage Indicator) toT(Test Data) orP(Production Data), accordingly. Production claims are sent to payers. Test claims aren't sent to payers - Stedi's test clearinghouse processes them and returns test 277CA acknowledgments so you can evaluate your claim processing pipeline. -
Fix any X12 EDI validation errors that appear after adding the claim content. Stedi highlights errors in red and displays the specification for the claim type you selected on the right side of the screen to make it easier to identify and fix issues.
These validations ensure your claim data conforms to the HIPAA specification. Stedi runs additional claim edits on your claim data after submission.
-
Click Submit claim.
Stedi processes the claim and runs claim edits to identify errors that could lead to a payer rejection. If a claim fails one of Stedi's edits, you'll receive a 277CA claim acknowledgment from Stedi rejecting the claim immediately after submission. This can happen even when the X12 EDI editor showed no errors before submission.
If the claim passes all of Stedi's edits, Stedi submits it to the payer. It will appear on the claims view within a few minutes.
Bulk claims
You can submit multiple claims in a single X12 EDI file, as long as they are all the same claim type (professional, institutional, or dental) and X12 version. You can submit multiple claims in the same 837 transaction by including multiple instances of the following loops:
Loop 2000A(Billing provider)Loop 2000B(Subscriber)Loop 2300(Claim Information) - You can submit up to 1,000 claim loops in each 837 transaction
After submission, Stedi separates your bulk 837 transaction into individual claims and sends each claim separately to the payer. This includes multiple claims going to the same payer - all claims within a bulk submission are sent individually to maintain consistency.
The following example would produce 12 separate claims (2 x 3 x 2 = 12), each shown individually on the claims view:
- 837 transaction contains information for two billing providers (2x
Loop 2000A) - Each billing provider has three subscribers (3x
Loop 2000B) - Each subscriber has two claims (2x
Loop 2300)
Then, you'll typically receive separate 277CA claim acknowledgments for each claim. Each claim will also receive its own test ERA from Stedi's test clearinghouse if the payer was STEDITEST.
275 claim attachments
If your claim requires attachments, you can include them through either submission method:
- CMS-1500 form: Add claim-level attachments in Box 19b and service-line attachments in Box 24. You can upload files directly or enter attachment control numbers.
- X12 EDI upload: Include the
PWKsegment inLoop 2300(claim-level) orLoop 2400(service-line) with elementsPWK01,PWK02, andPWK06to identify the attachment.
Visit Claim attachments to learn more.
View submitted claims
In the claims view, you can review and filter every claim in your account. Toggle test mode to ON to review test claims. Click any claim to review its details and download the auto-generated CMS-1500 claim form PDF.
CMS-1500 claim form PDF
When you submit a professional claim, Stedi automatically generates a CMS-1500 claim form PDF. Visit CMS-1500 claim form PDF for instructions about how to download, correct printer settings, and general best practices.